
How to Prepare Digital Art Files for Label Printing
Learn how to prepare a digital label artwork file for printing. Follow these steps to make sure your labels are ready to print.
Accepted Files:
- pdf, ai. and eps. (make sure you are submitting a single page pdf.)
- 300 dpi minimum
- CMYK color space
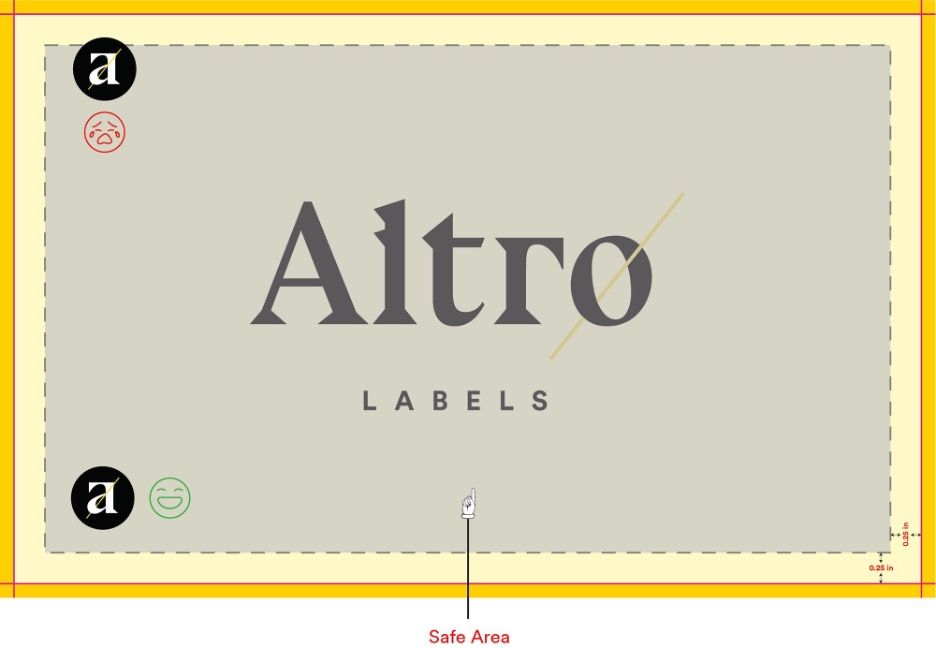
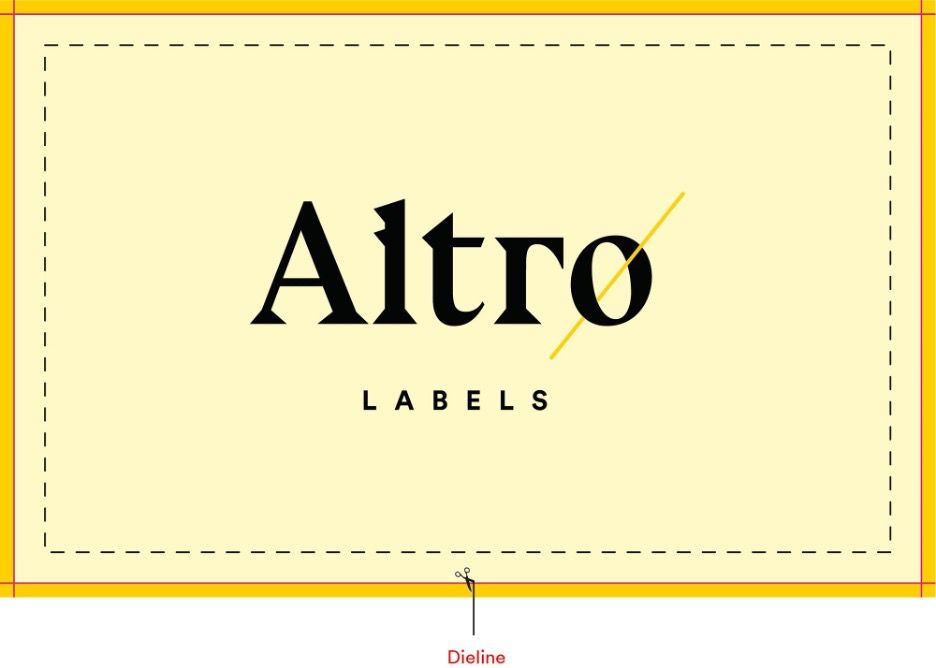
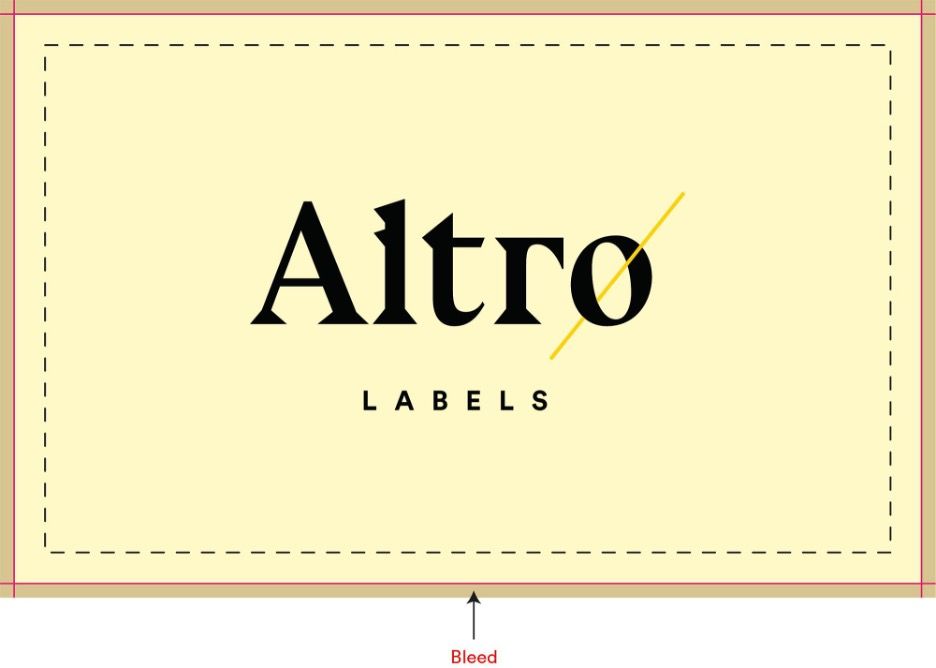
Safe Area, Dieline, and Bleed
Safe Area: This is the area where any text, important photos, and other critical parts of the design should be kept. Anything outside the trim may be cut off.
Dieline: This is the final size of your label. This is where we aim to cut off your labels.
Bleed: This is the area outside the dieline that will get cut off. Even though it gets removed, it’s still important to the overall production of your product.
Images: Raster vs. Vector
Raster: These images are made up of pixels and are commonly photographic. They need to be 300 dpi minimum at print size, for high-quality printing.
Vector: These are infinitely scalable graphics made up of paths, lines, and shapes. Vector graphics are commonly made in Adobe Illustrator.
When submitting artwork, include all linked files, current and updated, that are placed in your artwork layout, or embed them in the file. All images, linked or embedded must be supplied in CMYK format. Provide an original layered Photoshop file when possible.
For vector art DO NOT use an image editing software like Photoshop. Photoshop produces vector art, but it does not save it as a vector. Most designers use Adobe Illustrator to produce vector based art. You can use Photoshop to prepare and edit your raster images.
If you have a raster and vector combination artwork:
In Photoshop, do your entire photo editing (in CMYK mode), then “Place” the image in your Illustrator document. This would also be the best time to embed you image in the document instead of providing a separate file to link your images.
Here at Altro Labels we usually use Adobe Illustrator to prepare files for print.
Fonts:
Convert all fonts into outlines. We may not have your fonts, the printer may also not have your fonts. You need to convert your fonts to outlines so that when they are opened, they are not replaced by another font. Note: once you have converted your text to outlines, they are no longer editable.
Ensure all fonts are created in vector drawing software like Illustrator. DO NOT use photo editing software like Photoshop to create your texts.
Image Quality:
If you are providing a raster image(s), you need to make sure the quality of the image(s) is high. You cannot expect a high-quality print with a low-quality image. To make sure your image(s) is high quality, in Photoshop go to Image > Image size and make sure your resolution is 300 dpi in its actual size. Keep in mind that increasing the resolution of the image does not increase its quality and might lead to inferior quality and more problems.
Here are the steps you need to take in order to have a print ready file:
After editing your raster image in Photoshop and making sure it is a minimum of 300 dpi, it's time to place your image in your Illustrator file.
When placing your image, never drag your image into the artboard because that way you will lose the image's original resolution. To ensure that your image stays in its original resolution, simply click on the artboard once and reduce the size of the image to the size you need for your label. DO NOT increase the size of the image.
After placing your image, you will see a cross on your image. This indicates that your image is not embedded or linked in the Illustrator file. The best option is to embed your image by clicking on "Embed" on the top left side.
Now would be the best time to include your vector art.
Now you can type in your text and convert them into outlines.
Now your label is ready to print! Don't forget to include your dieline and bleeds!